Kavinsky Posted April 3, 2011 Report Share Posted April 3, 2011 Sonny should I put this bit about the light sockets in the guide as well?and I will start sending you more parts tommorow and hopefully it'll be all done and taken care of by tuesday, ill be sending you the last of the exterior photos tommorow then its on to the interior and the guide as the last piece which is where most of the work went. Quote Link to comment Share on other sites More sharing options...
Sonny-Burnett Posted April 3, 2011 Report Share Posted April 3, 2011 Don't feel bad about the confusion' date=' as none of us seem to know the technical terms and all seem to be talking in circles. We made a simple issue even more confusing. So, with all the confusion I would describe it to them as plainly as possible. Make sure you say it's for a 365GTB (wouldn't mention it is a replicar as at one time Ferrari cut some of the parts suppliers off who were working with the companies who made them) and that you want the hickeys (Georgia technical term) that holds the taillight bulbs and plugs into the taillights. You need two for single circuit and two for dual circuit. I explained it that way on the phone and then sent them to me very quickly.JN[/quote'] Thanks for the info and for clarifying, JN Never thought the phantom taillight issue could be solved by replacing the sockets. I just assumed the housing/sockets were old and the slippage was due to age/wear. Seems pretty simple. Don't think it should be too difficult to separate the old connectors and install the new ones. S-B Quote Link to comment Share on other sites More sharing options...
Sonny-Burnett Posted April 3, 2011 Report Share Posted April 3, 2011 Sonny should I put this bit about the light sockets in the guide as well?and I will start sending you more parts tommorow and hopefully it'll be all done and taken care of by tuesday' date=' ill be sending you the last of the exterior photos tommorow then its on to the interior and the guide as the last piece which is where most of the work went.[/quote'] If you have time would be good...many thanks for all the efforts and time, Kavinsky. Quote Link to comment Share on other sites More sharing options...
Kavinsky Posted April 4, 2011 Report Share Posted April 4, 2011 Just as a sidenote I think I figured out what episode that extra nose damage to the front flare occured.During the chase of "Bought And Paid For" at the begining of the chase the countach hits its nose on the uneven road surface while going around a corner and the daytona quickly follows suit right after itat 0:40 and it hits the road at that same point where the nose damage is too, I figured that it had to be sometime before florence italy where I noticed the nose damage on it at the begining of the end chase of that episode Quote Link to comment Share on other sites More sharing options...
Sonny-Burnett Posted April 4, 2011 Report Share Posted April 4, 2011 Just as a sidenote I think I figured out what episode that extra nose damage to the front flare occured.During the chase of "Bought And Paid For" at the begining of the chase the countach hits its nose on the uneven road surface while going around a corner and the daytona quickly follows suit right after itat 0:40 and it hits the road at that same point where the nose damage is too' date=' I figured that it had to be sometime before florence italy where I noticed the nose damage on it at the begining of the end chase of that episode[/quote'] Can't really see what you mean about damage here. But I have some scrapes under the nose on mine from prior owner that I need to repaint. Quote Link to comment Share on other sites More sharing options...
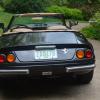
Kavinsky Posted April 4, 2011 Report Share Posted April 4, 2011 look close under the nose, the left side of the flare is missing otherwise the light would have caught it just like it did with the right.like on this replica: Quote Link to comment Share on other sites More sharing options...
CameraDaytona Posted April 4, 2011 Report Share Posted April 4, 2011 Just as a sidenote I think I figured out what episode that extra nose damage to the front flare occured.During the chase of "Bought And Paid For" at the begining of the chase the countach hits its nose on the uneven road surface while going around a corner and the daytona quickly follows suit right after it. Sorry Kavinsky - I can't see what you are talking about either. I believe that is my car in the scene with the Countach. There is evidence of damage to the area below the nose on my car where it has "bottomed" and hit below the nose, but I don't understand where you see the flare damage. Quote Link to comment Share on other sites More sharing options...
Kavinsky Posted April 4, 2011 Report Share Posted April 4, 2011 Hmm I thought that because of the scrape damage on the right flare that the reason why I cant see the left in those shots is because I thought it may be missing.it may be another optical illusion caused by the bottoming out and slight warping of of the nose from "The Hitlist" as I observed in some of the scenes of the "Bought And Paid For" chase and "Definitely Miami" (where the nose was covered in wet sand) the crossmember for the engine sticking out below the nose and mistakenly thought it to be an air intake like on the real one.actually looking at the "Definitely Miami" Shot I can see the left flare sticking out, ah well I may be right about the scrape damage though. Quote Link to comment Share on other sites More sharing options...
Sonny-Burnett Posted April 4, 2011 Report Share Posted April 4, 2011 look close under the nose' date=' the left side of the flare is missing otherwise the light would have caught it just like it did with the right.like on this replica:[/quote'] I must be blind...this could just be camera angle, don't you think? Quote Link to comment Share on other sites More sharing options...
Kavinsky Posted April 4, 2011 Report Share Posted April 4, 2011 Camera in this photo when you said 350mm did you mean the green line or the red line from the center? Quote Link to comment Share on other sites More sharing options...
jurassic narc Posted April 5, 2011 Author Report Share Posted April 5, 2011 Ferrari v. McBurnieWhile the facts surrounding the Daytonas have been put down in various forms, I just ran across this brief for the civil case and counterclaim between Ferrari and McBurnie.This is a quote from the above styled case in US District Court for the Southern District of California."Ferrari introduced the Daytona Spider in Europe in 1969. Ferrari manufactured 127 models of the Daytona Spider until 1974 when Ferrari ceased to manufacture this body design. Of the 127 manufactured, 69 were sold in the United States.In 1980, McBurnie and Albert Mardikian decided to produce a replica of the Ferrari Daytona Spider. Mardikian entered into a contractual agreement with McBurnie whereby McBurnie agreed to produce a specialty car called the Mardikian” for Mardikian’s company Trend Imports. Mardikian delivered a genuine Ferrari Daytona Spider to McBurnie, from which McBurnie produced molds of the car. McBurnie reproduced the body design in fiberglass, relying in part on the molds, and fitted the body onto a Corvette chassis. The first such Mardikian vehicle was completed in February, 1982.In 1984, Mardikian entered into an agreement with Universal City Studios, producer of the television show “Miami Vice”, to lease two “Mardikian” vehicles for use on the television show. The Ferrari replica was used until 1986 when the “Mardikian” vehicle was replaced by a current model Ferrari known as the Testarossa.The facts are vague as to the reason for discontinuing the use of the Mardikian vehicle. Ferrari N.A. was approached by the Miami Vice production staff regarding the use of the Testarossa. At the same time, Ferrari N.A. found out that the Miami Vice production staff was using the Mardikian vehicle with Ferrari emblems attached to the outside of the vehicle in their television program. Subsequently, Universal City Studios and Ferrari N.A. entered into an agreement whereby Ferrari N.A. agreed to lease two Testarossas to Universal City Studios for promotional consideration on the Miami Vice television program, and Universal City Studios agreed, among other things, not to use any Ferrari replicas during the term of the lease.Sometime in 1983, McBurnie ended his relationship with Mardikian. It appears that Mardikian’s company went bankrupt and was unable to pay McBurnie for the cost of producing the Mardikian vehicle. In June, 1984, McBurnie produced the first of his own McBurnie California Daytona Spiders. McBurnie began to advertise and sell the cars in the form of a completed “turn-key” model or in kit form. Until the time Miami Vice substituted the new Ferrari Testarossa for the Mardikian vehicle, calls regarding the Mardikian were forwarded from Miami Vice to McBurnie." Quote Link to comment Share on other sites More sharing options...
Kavinsky Posted April 5, 2011 Report Share Posted April 5, 2011 jurrasic just a quick question im trying to help Sonny out with a steering wheel and the seller said it was 14 inches.now with momo did they messure it from the center to the edge of the rim or to the outside of the rim when they say its 350mm/13.78 inches? Quote Link to comment Share on other sites More sharing options...
jurassic narc Posted April 5, 2011 Author Report Share Posted April 5, 2011 jurrasic just a quick question im trying to help Sonny out with a steering wheel and the seller said it was 14 inches.now with momo did they messure it from the center to the edge of the rim or to the outside of the rim when they say its 350mm/13.78 inches? I would guess it is measured from the center. But not sure. Quote Link to comment Share on other sites More sharing options...
CameraDaytona Posted April 5, 2011 Report Share Posted April 5, 2011 Camera in this photo when you said 350mm did you mean the green line or the red line from the center?As I put in a post on 2/20, the wheel is 13.5 inches in diameter (outer rim edge to outer rim edge). It is 12.5 inches from the center of the rim to the center of the rim. So, in your picture the measurement of the red line would be 11.5 inches divided by 2 or 5.75 inches. The green line (I'm assuming you mean it to go to the outer edge of the wheel rim) would be 13.5 inches divided by 2 or 6.75 inches. As I said in my previous post, it depends on how the wheels are measured for the sales literature. If they are measured from the center of the rim to the center of the rim, then 12.5 inches would be the correct size. If they are measured like your green line shows (outer to outer) the size would be 13.5 inches. Hope this helps. Quote Link to comment Share on other sites More sharing options...
CameraDaytona Posted April 5, 2011 Report Share Posted April 5, 2011 This is basically as I heard the story from McBurnie, except my understanding was that Ferrari approached Universal rather than the other way around - who knows. The fact that McBurnie was not paid by Mardikian is also new to me, but would be consistent with the interior guy saying that he was never paid. However, I would have thought that McBurnie would have done something to get paid - like take back the cars. Quote Link to comment Share on other sites More sharing options...
Kavinsky Posted April 5, 2011 Report Share Posted April 5, 2011 Okay that does help, that means the one I found for Sonny is not exactly the right size. Sorry about constantly asking about this, I keep on getting confused about it just like him.Camera one other question is the ferrari trunk lettering on your car 8 inches long and 1.2 inches high? Quote Link to comment Share on other sites More sharing options...
CameraDaytona Posted April 7, 2011 Report Share Posted April 7, 2011 Kavinsky - Here are a couple pictures to give you the dimensions of the emblem - about 7 and three-quarters long and slightly over an inch in height. If you go to the gallery, you can see the blown up pics. (I still haven't figured out how to make them big like you do.) Quote Link to comment Share on other sites More sharing options...
Sonny-Burnett Posted April 7, 2011 Report Share Posted April 7, 2011 http://www.miamiviceonline.com/photoplog/images/61/medium/1_Emblem-1.JPG Thanks CD, perfect. Quote Link to comment Share on other sites More sharing options...
Kavinsky Posted April 7, 2011 Report Share Posted April 7, 2011 Thanks, when you post here the manage attachements program or whatever's being used here resizes the photos and makes them smallerso basically what I do is I download them from the gallery in there original full sized forum and cut as much of the edges off as possibile in the windows photo gallery so that they appear bigger and you can see the point of the photo better like here: Quote Link to comment Share on other sites More sharing options...
Kavinsky Posted April 7, 2011 Report Share Posted April 7, 2011 oh wait a minute... I see what your doing now.dont just right click on the photo and click view image in the photo gallery, left click on it first, let it expand and then do that like here:or instead of posting in the photo gallery, taking the adress of the photo and putting it in the insert image thing just click on manage attachments below your post in the "reply to thread" thing and upload them directly from your computer. Quote Link to comment Share on other sites More sharing options...
CameraDaytona Posted April 7, 2011 Report Share Posted April 7, 2011 Thanks Kavinsky - I'll try your suggestions next time! Quote Link to comment Share on other sites More sharing options...
Kavinsky Posted April 7, 2011 Report Share Posted April 7, 2011 your welcome, hell I didnt figure that out myself till I accidentally left clicked on a photo of jurrasics daytona awhile back. Quote Link to comment Share on other sites More sharing options...
Kavinsky Posted April 10, 2011 Report Share Posted April 10, 2011 Sonny I'm just about done with the guide, I've got one or two minor details to finish in the guide that ill do tommorow and then just send it all to you.and let me tell you this guide literally covers EVERYTHING, it is literally the linchpin of the entire project and on that note jurrasic what shots of the dash do you need? Quote Link to comment Share on other sites More sharing options...
jurassic narc Posted April 11, 2011 Author Report Share Posted April 11, 2011 Sonny I'm just about done with the guide' date=' I've got one or two minor details to finish in the guide that ill do tommorow and then just send it all to you.and let me tell you this guide literally covers EVERYTHING, it is literally the linchpin of the entire project and on that note jurrasic what shots of the dash do you need?[/quote'] I pickup my completed dash tomorrow. Will post pics once it is installed. Just wanted to see your guide to see if there are things I may have missed.Thanks, JN Quote Link to comment Share on other sites More sharing options...
Kavinsky Posted April 19, 2011 Report Share Posted April 19, 2011 So Jurrasic how did the dash turn out?and also Sonny it might be a good idea to either make sure that when your changing the tires off that you have the spinners marked for either wheel that there supposed to go with, if the spinners arent on the right wheel they can become loose from driving and breaking:http://www.jaylenosgarage.com/extras/book-club/jays-book-club-corvette-bible/maybe just mark the spinners backs with a permanent marker like for the left front LF and apparently there is another way to get around this by having them threaded for either tire like on some of the continuation cobra's they made a few years ago: Quote Link to comment Share on other sites More sharing options...
Recommended Posts
Join the conversation
You can post now and register later. If you have an account, sign in now to post with your account.